Android notifications in GNOME Linux with GSConnect

MacOS’s Continuity show the possible level of integration between an iPhone and a Mac computer when a single company controls the OS stack of both devices. Sync notifications, make and pick-up phone calls from the desktop, file sharing, etc. Less powerful, but on the same line, the Android – ChromeOS integration offered by Google.

I’ve always missed something similar to show my Android phone notifications on my Linux desktop, without using questionable cloud services (in terms of privacy). But today I almost completely filled the gap, thanks to KDE Connect.

KDE Connect allows devices to securely share content like notifications or files and other features like SMS messaging, clipboard sync and remote control. The complete list of features supported by KDE Connect is impressive:

  • Receive phone notifications on the desktop computer and reply to messages
  • Control music playing on the desktop from the phone
  • Use the phone as a remote control for the desktop
  • Run predefined commands on the desktop PC from connected devices
  • Check the phone’s battery level from the desktop
  • Ring the phone to help find it
  • Share files and links between devices
  • Browse the phone from the desktop
  • Control the desktop’s volume using the phone
  • Send SMS from the desktop

And there are two additional good news: everything runs locally on the Linux desktop computer (no cloud needed), and there is a porting for GNOME, called GSConnect. It uses GNOME Shell with Nautilus, Chrome and Firefox integration.

KDE Connect wiki has detailed instructions on how to install and configure the software. Below, I’ll report what I did to install and configure GSConnect on my Linux box with Ubuntu 20.04.

GSConnect installation

Despite being available as gnome-shell-extension-gsconnect package since Focal (20.04), it seems the recommended way to install GSConnect is via a GNOME Shell extension. So, I opened the relative GNOME Shell Extensions website on my Linux desktop computer, and agreed in installing the extension.

Alternatively, there is a manual installation procedure, consisting in download the latest release of the Extension from GitHub, and then installing it using the following command:

gnome-extensions install --force gsconnect@andyholmes.github.io.zip

A restart of GNOME Shell is required, and there are different ways of doing it, based on Wayland or X11/Xorg (how to know the server in use).

Android installation

In parallel, the app KDE Connect needs to be installed from Google Play or F-Droid.

Then, the setup can continue following the standard instructions, both on Android phone, and on the desktop computer. In a couple of minutes, the mobile device should be paired with the desktop.

The GSConnect extension menu, after paired with the mobile device

Several app features will work only after granting the respective Android App Permissions to KDE Connect. The app shows a list of those that are disabled, and tapping on one of them opens the corresponding system setting, where the permission can be given.

For example, to share notifications with the desktop computer, open the app, tap on the “Notification sync”, and then tap again to open the corresponding system setting for granting the permission.

To enable integration with Nautilus, in order to send files from the desktop computer to the mobile device, the python-nautilus package has to be installed:

sudo apt install python-nautilus
Easily send files from desktop to the configured destination folder on the mobile device

In case of problems, the Help section of the wiki contains troubleshooting instructions to follow.

Conclusions

GSConnect desktop app, and the KDE Connect mobile app, offer a long list of feature that will require some time to be explored and mastered. But they almost allow to forget to have a mobile phone while using a desktop computer.

As a final note, there are early releases of KDE Connect for Windows and MacOS.

Raspberry PI, Logitech c920 and WebRTC videocall: #fail

I had the idea to create a no-brain and enjoyable setup for my parents to videocall with me. I know I can use Skype, Hangouts or lot of similar apps on any PC / tablet, but for me no-brain and enjoyable means sit down on the living room couch, press a key somewhere, look at the big TV screen and start talking with me.

There are solutions like Chromebox for Meetings (hardware here and here) or the GT Mini 3330, but the price is too high for a whim like mine. After different iterations, I’ve figured out a solution, although final result is still not working for some reason. This post describes what I’ve done so far.

General architecture

TL;DR: A RasPI 2B connected to the TV, Logitech c920 webcam, WebRTC video call in a fullscreen Chromium tab.

An easy way to do bidirectional video call, nowadays, is to use dedicated apps like the before mentioned Skype, Hangouts, Ekiga or many others. But you often need a PC connected to the TV, you cannot automate the connection process, plus most solutions are using proprietary protocols. The alternative is to rely on the promises of WebRTC project and create a multi-party video chat. Nothing more than a browser and a camera is needed. Sounds good!

A Raspberry PI 2B model is powerful and cheap enough for running such setup and, connected to a TV screen via HDMI port, can use the TV for video and audio output.

As for the camera, I went for a Logitech c920. Why? Because it’s supported out of the box on Raspbian, works with fswebcam and it doesn’t need a powered USB hub, has a wide-angle lens very good for video calls, has a good directional microphone and can produce an hardware encoded FullHD H.264 video stream (it can be checked with v4l2-ctl –list-formats), with no additional computational overload on the RPi side. And it costs around 80 euros. Video quality is excellent and audio recored is loud and clean even if the speaker is 3 meters far from the camera: huge enough to cover the average distance between a couch and a TV :)
It may happen to see a rainbow square top right on the display while using the camera: it’s the under-voltage warning of the RPi, so connect it to a more powerful USB port, to an external USB power source or, as last resource, connect the camera to a powered USB hub.

Regarding the software, nothing more than a WebRTC-compatible browser, running on RPi, is required: IceWeasel and Chromium have it. To host the WebRTC call, there are plenty of solutions: AppRTC, Jitsi, OpenTokRTC, just to mention few, are online services that can be used to start a WebRTC video call. Source code is even available for OpenTok and AppRTC, to create a personal server.
Once selected the service, a script can open a fullscreen browser window pointing to the desired chat room url, once the RPi graphic environment starts, so the only action required is to power-up the Raspberry and wait to be connected. Bingo :)

Step-by-step config

Basic system
Downloaded NOOBS offline, formatted the SD card as one FAT32 partition using GParted,  and unzipped the NOOBS archive on SD card. Inserted the SD on the RPi and booted. Selected Raspbian Jessie, waited for the installation to finish. Alternative instruction for Linux here.

Run the usual sudo apt-get update, sudo apt dist-upgrade, sudo rpi-update commands triad

Browser
Regarding the browser to use… Well, it’s complicate.
As first try, I followed this guide that suggested to use Iceweasel. It was as simple as a sudo apt-get install iceweasel, but unfortunately vLine is not active anymore, with appRTC IceWeasel crashes and Jitsi.org doesn’t support Iceweasel < 40 (Jessie has v38 on the repo).
So I installed Chromium following this guide, using the precompiled armhf packages from Ubuntu Ports. But also this guide works, using packages in the Launchpad Librarian.

Why Chromium v45? Because v47 has a annoying bug that prevent a correct render of YouTube, appRTC and Jitsi, among the other.

Time to start my first WebRTC video call: I opened a Jitsi link to launch a test call on RasPI and my PC, authorised the website to use my mic and camera and I had both sides connected, audio and video working as expected. Wow moment, I’m an happy man!!!!

Unfortunately, after 30 to 60 secs, audio from the RasPI side stops working, and only the video is transmitted. I can see video from the RasPI side of the call, but I cannot hear the audio. Instead, on the TV screen, it’s possible to see and hear my stream. After tons of tests, I still don’t know why this is happening and how to solve it. Also a post on Raspberry PI forum isn’t helping. This is the biggest blocker I have right now :(

Converge Hackathon: developers + designers + diversity. Is it even possible?

One of the cool aspect of my current job is the freedom I have to experiment with what I think it’s valuable and important for the developer ecosystem. This time I tried to tackle two aspects, both under the diversity umbrella: expertise mix and gender gap.

In collaboration with frog design (thanks Laura and Alex for the help), we envisioned a platform to experiment and iterate around these topics, so we create the “Converge Hackathon” format. Let’s analyse the main idea and the first implementation, held at Google HQ in Milan, March 7th.

First, why an hackathon?

We all know what an hackathon is: a fixed amount of time for experimenting with new things, get in touch with smart people and have fun with passions. In addition, “Converge Hackathon” aims to improve the collaboration between designers and developers during the whole process of thinking, refining and realizing an idea. Hence the name. And because I viscerally love the hackathon format ;)

20150307 - Converge Hackathon 03
Don’t be shy and… present!

How the collaboration between developers and designers has gone?

Pretty much well, I would say.  This collaboration was one of the more acknowledged strength of the event. Here some of the attendees’ comments:
“Was challenging to work with stranger but at the same time interesting and funny. The best part was the division of the work”
“The collaboration was really good. It was my first time working with developers and I enjoyed a lot. Otherwise, I think it was needed a bit more of integration regarding with how the design and the coding could be merge”
“I’ve meet a lot of interesting people and different points of view on even the simplest thing”
“Good organization, very nice the initiative of mixing designers with developers and give an opportunity to work together”
Although it was challenging:
“I’m a designer. Speaking with Developer is very difficult because they only think in their square area.”
“At the beginning was difficult to know new people and get in touch with the developers”
To summarise: no pain, no gain when you start this kind of collaboration :) But the feedback showed that audience gained a lot, despite some small pain.
We balanced the attendees considering 2/3 of developers and 1/3 of designers, and frog carefully selected the latter viewing their portfolio, their profile, their activities. They wanted to be sure that the right profiles were part of the crowd. For developers, I let them in without any particular control. I trust in natural selection ;)
Another learning point was about the teams creation: such different crowd requires a focused pre-work for mixing the people in a proper way, something that goes beyond the quick ice-breakers we did in the morning, that work generally well in a standard hackathon. Dedicate the right attention to this aspect is crucial.
One final consideration is about the timing: one day only event makes hard to create something meaningful, and the ideation phase, that generally is very short during a normal hackathon because the attendees are eager to “get their hands dirty with code”, this time was fostered, and mostly led, by designers. The result was that final hacks were more elaborated that the average I’ve generally seen, but with the drawback of having prototypes less “working” than the usual. As note for us, organisers, next time we need to keep the ideation process inside a given timeframe, otherwise the risk is that, once the first half of the event has gone, teams are still thinking about what they can realise.

20150307 - Converge Hackathon 01
Diversity? Really not an issue for this team

Continue reading “Converge Hackathon: developers + designers + diversity. Is it even possible?”

Raspberry Pi, RPi Camera and Roomba: a first-person experience of the housecleaning

Raspberry and RoombaToday’s challenge

Have a first-person view of the Roomba cleaning, using a RasperryPi, a RPi Camera and some additional stuff.


Raspberry basic configuration

Hardware side, I used the most standard available components: a Raspberry Pi model B, the RPi Camera module and a Edimax EW-7811Un 150Mbps Wi-Fi USB card.

Regarding the OS, there are a lot of distributions available for the Raspberry Pi, but I went for a plan Raspbian: wide support, flexibility, de-facto standard. I installed it using the NOOBS setup, following detailed instruction to load NOOBS image on a sd-card under by Ubuntu pc. Then, started the RasPi, selected Raspbian from the distro installation menu, waited a little bit for the installation to complete.
In the raspi-config app, I enabled the camera and enabled SSH server. Then the usual sudo apt-get update && sudo apt-get -y dist-upgrade && sudo rpi-update && sudo reboot combo, to update everything. The RasPi is ready to rock :)


WiFi setup

Configure the WiFi is easy with the right card (this is an evergreen truth in Linux world). Because the Edimax is supported natively, the only thing I did was:

sudo nano /etc/network/interfaces

and added these lines at the end of file (change them for a different WiFi encryption model). Alternative steps are available too.

allow-hotplug wlan0
iface wlan0 inet dhcp
wpa-ssid "YOUR_NETWORK_SSID"
wpa-psk "YOUR_WIFI_PASSWORD"

Reboot and voilà, now the ethernet cable can be unplugged and the RasPi made another step toward movement freedom.


Camera software and configuration

There are different options available. Out-of-the-box, Raspian can both capture still images from camera or recording videos using raspistill and raspivid commands, respectively.

Another option is to use motion as backend to expose the camera video stream. The only problem is that stock version doesn’t (still) support RasPi camera device file, so a big thanks to dozencrows for the fixes has as done. There is a detailed forum post with the final files to replace on the RasPi, plus a couple of tutorials explaining detailed steps to have a working setup, included the sudo apt-get install libjpeg62 part.
With a working motion installation, different frontends can be used to see the camera stream, like the motion server itself, motionEye etc, and the RasPi can even be seen as a normal IP camera from lot of software, included Synology Surveillance Station.
Too lazy to do everything by hand? A complete distro, MotionPie, is an out-of-the-box solution in active development. Flashing the image on a sd-card and reboot the RaspPi is the only requirement, wifi configuration apart.

I found also another project, RaspberrIPCam, a fork of raspivid that offers a working website for accessing the camera stream, Synology Surveillance Station integration and more. Step-by-step guide here.

But, personally and because of the challenge, I chose another way: the project RPi Cam Web Interface.


RPi Cam Web Interface

This solution works in a pretty clever way: instead of using motion infrastructure, it relies on the raspimjpeg command, that is able to capture single frames from the camera stream and its configuration can be changed on the fly writing commands to a Unix pipe. Then motion is configured to point to raspimjpeg output, so it can do all its motion detection magic without a real access to the camera. And Apache serves a micro-site where camera stream is shown and some php scripts glue all together and provide additional features like an easy access to captured video files, changing camera parameters, controlling the entire RasPi from the web interface (included a restart / reboot) and much more.

To install RPi Cam Web Interface, I execute

cd
git clone https://github.com/silvanmelchior/RPi_Cam_Web_Interface.git
cd RPi_Cam_Web_Interface
chmod u+x RPi_Cam_Web_Interface_Installer.sh
./RPi_Cam_Web_Interface_Installer.sh

and started the whole app (only the first time), using

./RPi_Cam_Web_Interface_Installer.sh start

The install script allows to customize the Apache directory where all the files are stored changing the rpicamdir variable value in the script itself. Doing so, it’s possible to avoid conflicts with other apps that serve additional pages and sites on the same RasPi. Additional info are available reading the bash file. Use the source, Luke!

To access the website, opening http://raspi_address/ from any browser is enough.

To disable the red light from the camera module, I run

sudo nano /boot/config.txt

and added the following line at the end of file

disable_camera_led=1


Roomba setup

Thank to the WiFi, the RasPi could freely connect to the network, and an USB power bank provided the necessary power for the experiment. Scotch tape to assemble everything and here the final result. Pretty cool, isn’t it?

(tinyCam Monitor is responsible for casting the camera stream on the TV, thanks to a Chromecast)


Notes on RPi_Cam_Web_Interface

Some salient parts of RPi_Cam_Web_Interface architecture, mainly to help my memory over time.

motion is configured to read images from local server, using netcam_url http://localhost/cam_pic.php, and this php script returns the content of /dev/shm/mjpeg/cam.jpg file, where raspimjpeg writes the camera preview thanks to the setting preview_path /dev/shm/mjpeg/cam.jpg.
When motion detects something, it executes the command on_event_start echo ‘ca 1’ > /var/www/FIFO, and the corresponding on_event_end echo ‘ca 0’ > /var/www/FIFO when the event ends. /var/www/FIFO is the Unix pipe file used to control raspimjpeg  via the control_file /var/www/FIFO option. Doing so, raspimjpeg creates the video file returned in the web page with all the captured files.
All motion web-service options and recording capabilities are switched off in the config file.

When installing, a link to the camera preview file is created under Apache site directory using the command sudo ln -sf /run/shm/mjpeg/cam.jpg /var/www/$rpicamdir/cam.jpg. In this way, http://raspberry_ip/cam.jpg returns the latest image from the camera, and Android app like tinyCam monitor can points to this address to show camera stream, image by image.

To create Python app that uses the camera, picamera interface can be used.


My Synology DS214play setup

Synology DS214 Play
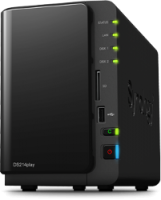
A NAS is a wonderful beast: you can use it to create your private cloud to store, backup and share your files, as a DLNA media server for smart TVs, as a download station for a variety of different contents and much, much more. True, you can configure your RasPI to do the same job, but appliance solutions are just… Ready to use! In the hard task to pick-up one for my house, my choice, eventually, has gone to Synology DS214play.

Why? Because Synology is a very well known manufacturer of corporate NAS solutions and the software used in the high end products is the same of consumer segment of their offer. Because they have a huge number of clients available for practically all OSes, desktop and mobile, to sync files, watch videos, listen to music, download files, acts as a web, mail, file, git server, IP cams monitoring and much, much more. Because they are easily customizable and there is a vibrant community (even in Italian) of professional and domestic users behind these products. And because the DS214play has an Intel Atom CPU, can transcode 1080p video on-the-flight, has 2 bays for HDs and has an affordable price.


Cloud store, and file sharing

First of all, the NAS can be used as Cloud Station to create a private cloud storage, while the dedicated app  keep in sync your data across different machines (no matter of the OS). Once the router and a dynamic DNS service are configured, data is kept in sync also outside the LAN, so bye bye to Dropbox, Google Drive and any other public cloud services.
In alternative, it is possible to setup a classic rsync flow between a Linux/Mac and the NAS. I used the latter, and now I backup my entire desktop HD to the NAS, and the NAS can then backup its entire content (or part of it) on a cloud backup storage, like S3, Azure and others. Steps to setup rsync, ssh keys and all the whole process are explained here. If ssh connects to the NAS but rsync doesn’t work, Network Backup has to be enabled  via Menu -> Backup & Replication -> Network backup destination -> Enable Network Backup.


Extending the software

SynoCommunityAdditional software could be added using a well-know packages-repositories mechanism. The official repository has some app, but the real magic starts when the SynoCommunity repo is added to the system. Git Server, Horde, ownCloud, CouchPotato, Python, Memcached, Mercurial, Headphones, SABnzbd and many more are all at a click distance now. And they run directly on the NAS, with a lower power consumption compared to a dedicated pc.
It is also possible to create new packages with the help of spksrc, a cross compilation framework intended to compile and package softwares for Synology NAS


Manage movies, TV series and video in general

First solution is to use DS Video, the dedicated client to manage the personal collections of movies, TV series and videos. It’s available via web interface, for mobile OSes and included in some Samsung TVs. ChromeCast is supported, so is possible to browse the movie catalog from web / smartphone /tablet and watch it directly to the TV, without connecting a single cable. Obviously the video format have to be compatible with Chromecast, but it’s always possible to re-encode the video in a supported format (download on a pc, convert, copy back to the NAS).

Plex Media ServerIf DS Video is not enough, Plex Media Server can be installed too, with all the goodies Plex offers :). Once the Plex package has been downloaded, a manual install in the Synology Package center is required. Before doing so, Settings -> General -> Trust Level -> Allow any publisher, otherwise the installation will fail with a “This package does not contain a digital signature” error. Plex server new versions has to be checked from time to time, because it isn’t automatically updated by the Synology Package center. Finally, Plex does not support the hardware transcoding features of the DS214play or DS415play, so up to 720p videos are transcoded, with stuttering and pausing during playback and 100% of CPU usage. But Plex interface is way better than DS Video to me, catalog recognizes a bigger number of videos, so I still prefer to use Plex for browsing and organizing my movies and anime collection.


Music and Photos

I’m not a big user of music (I’ve a Sonos system at home, all the rest is history now), but music works pretty much like movies, with a dedicated app plus some more available from the community. Photos too.


Download station

One of the area where Synology excels is the entire pipeline of scouting, grabbing, downloading, organizing and making available contents. For example, it’s possible to simply add a movie to the IMDb Watchlist and have it automatically downloaded at home, ready to be streamed to the TV via Chromecast. Or as soon as a followed TV series has a new episode aired, it is automagically downloaded on the NAS, with subtitles, ready to be viewed on XMBC, without any intervention. Amazing! :) Let’s see a potential setup for this. Please note that the following steps bring to illegal actions in different countries, so I highly discourage everyone in doing that.

One way for automagically having latest TV series episode without a single interaction, uses a RSS feed technique. On the search results page of Kickass and other services, it’s easy to find an RSS icon that points to an RSS feed with the results of the search. Every time the feed url is loaded, new results can be found inside it, if any.  A specialized service, like showRSS, can create more fine-tuned feeds, with a particular file quality only etc.
The default Download Station app is used to download BT/HTTP/FTP/NZB/Rss feed/eMule files, so the RSS feed url can be added to the app, checking “Automatically download all items” option. Voila’, it works :) A drawback of this approach is that non-useful downloaded files must be manually deleted and subtitles are not downloaded.
If Kickass-like services are banned in a particular country, generally changing the NAS or router DNS and use OpenDNS (208.67.220.220) or Google Public DNS (8.8.4.4), can workaround the limitation.


A more advance setup for the download station

Sick BeardSick Beard watches for new episodes of favorite TV shows and when they are posted, it downloads, sorts, renames, generates metadata and download subtitles, plus more. It is available as package in the SynoCommunity repo and, once installed (along with Python package), can be configured to use Download Station for downloading snatched files. SABnzbd can work too for nzb files (available in the SynoCommunity repo).
If Sick Beard is unable to communicate with Download Station directly, a Watched folder can be configured in Download Stations under Settings -> BT/HTTP/FTP/NZB -> Location, and SickBeard need to save torrent and nbz files in that folder, under Settings ->Search Settings -> NBZ or Torrent search -> Method: Black hole and selecting the same folder used before. Now Download Station will look for files in that folder, grab them as soon as they’re added by Sick Beard and start the download.
In the Settings, subtitles download can be enabled, while post-processing options are useful to rename and organize files and download metadata (for XMBC, for example) once Download Station has downloaded them.

couchpotatoSimilar approach for movies, this time using CouchPotato. Once installed from the SynoCommunity repo (Python package required too), Settings -> Downloaders -> Black hole directory to communicate directly with the Download Station. Then CouchPotato can be configured to follow IMDb or Movies.IO watchlist, Goodfilms user queue, Rottentomatoes, IMDb, Kinepolis charts and much more.
The potential issues with the standard version of CouchPotato is that it searches only on some newsgroup services, with a limited support for torrents. To solve that, is possible to install the CouchPotato Custom package instead (and Git and Python packages) from the SynoCommunity repo and, during the first launch, specify a github repo with a customized version of CouchPotato. For example, https://github.com/RuudBurger/CouchPotatoServer.git is also able to search on ThePirateBay and KickAssTorrent services. Change DNS as specified above if required.

SickRageIf ThePirateBay and KickAssTorrent are a need also for TV series, the same, “Custom” technique could be used with a fork of Sick Beard, called SickRage. Installation is pretty straightforward: first the Sick Beard Custom package (with Git and Python packages) from the SynoCommunity repo need to be installed and, during its first launch, https://github.com/echel0n/SickRage.git must be used as Fork URL and master as branch. That’s all, with more detailed instructions in the official forum. Configuration of SickRage follows the same settings of Sick Bears, but now there are a bunch of additional Search Providers to use ;)


The NAS is really a great piece of hardware, and software flexibility allows to use in a variety of different way (what about hosting your WordPress blog there?). Future exploration will bring, for sure, to additional setups (I’ve in mind something for IP cams, for example), so stay tuned!


Fastboot mode for Android Wear devices (G Watch, Gear Live, SmartWatch 3)

Putting Android devices in Recovery mode / Fastboot, when you don’t have access to adb, is an art. And Android Wear, where you have only one button (the power button), adds even more entropy to the whole process.

So let’s gather the different procedures for the different watches.

LG G Watch

  • Find the reset button: it is on the back of the device, near the pins to charge it.
  • Press the button using a paperclip, a SIM ejector or your fantasy
  • Wait for LG logo to appears on screen
  • While the logo is showing, swipe from the top left-hand corner to the the bottom right-hand corner in one, diagonal swipe.
  • From the Fastboot menu, you can launch the Recovery Mode
  • Video

LG G Watch R

  • Turn off the watch and then turn it on normally
  • Wait for LG logo to appears on screen
  • While the logo is showing, swipe from the top left-hand corner to the the bottom right-hand corner in one, diagonal swipe, pressing and holding the power button
  • Alternatively, if the swipe doesn’t work, instead of swiping start tapping the screen with two fingers, one on the top left (10) and one on the bottom right (4), pressing and holding the power button
  • From the Fastboot menu, you can launch the Recovery Mode
  • Video

Samsumg Gear Live

  • Turn off the watch and then turn it on normally
  • Wait for Samsung logo to appears on screen
  • While the logo is showing, swipe from the top left-hand corner to the the bottom right-hand corner in one, diagonal swipe, pressing and holding the power button
  • The bootloader appears
  • Select the Fastboot or Recovery mode swiping downward, and swipe to the right to confirm the selection.

Sony SmartWatch 3

  • Detach any USB cable connected to the watch
  • Turn it off holding the power button and keep holding the button until the watch vibrates three times and then switches it off
  • Press the power button and keep holding. A blue screen that prompts to insert an USB cable will display
  • Double tap the power button
  • A black menu will display, with on-screen instructions
  • Move to Fastboot or Recovery Mode pressing the power button, once a time
  • Select Fastboot (or Recovery) by double pressing the power button

For extreme modding, there is also a third mode available, the Download mode.