MacOS’s Continuity show the possible level of integration between an iPhone and a Mac computer when a single company controls the OS stack of both devices. Sync notifications, make and pick-up phone calls from the desktop, file sharing, etc. Less powerful, but on the same line, the Android – ChromeOS integration offered by Google.
I’ve always missed something similar to show my Android phone notifications on my Linux desktop, without using questionable cloud services (in terms of privacy). But today I almost completely filled the gap, thanks to KDE Connect.
KDE Connect allows devices to securely share content like notifications or files and other features like SMS messaging, clipboard sync and remote control. The complete list of features supported by KDE Connect is impressive:
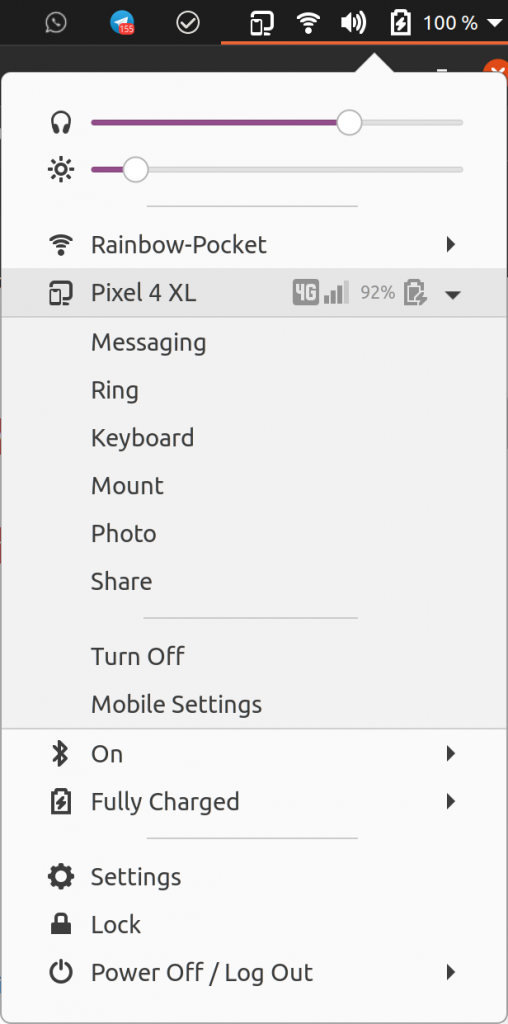
- Receive phone notifications on the desktop computer and reply to messages
- Control music playing on the desktop from the phone
- Use the phone as a remote control for the desktop
- Run predefined commands on the desktop PC from connected devices
- Check the phone’s battery level from the desktop
- Ring the phone to help find it
- Share files and links between devices
- Browse the phone from the desktop
- Control the desktop’s volume using the phone
- Send SMS from the desktop
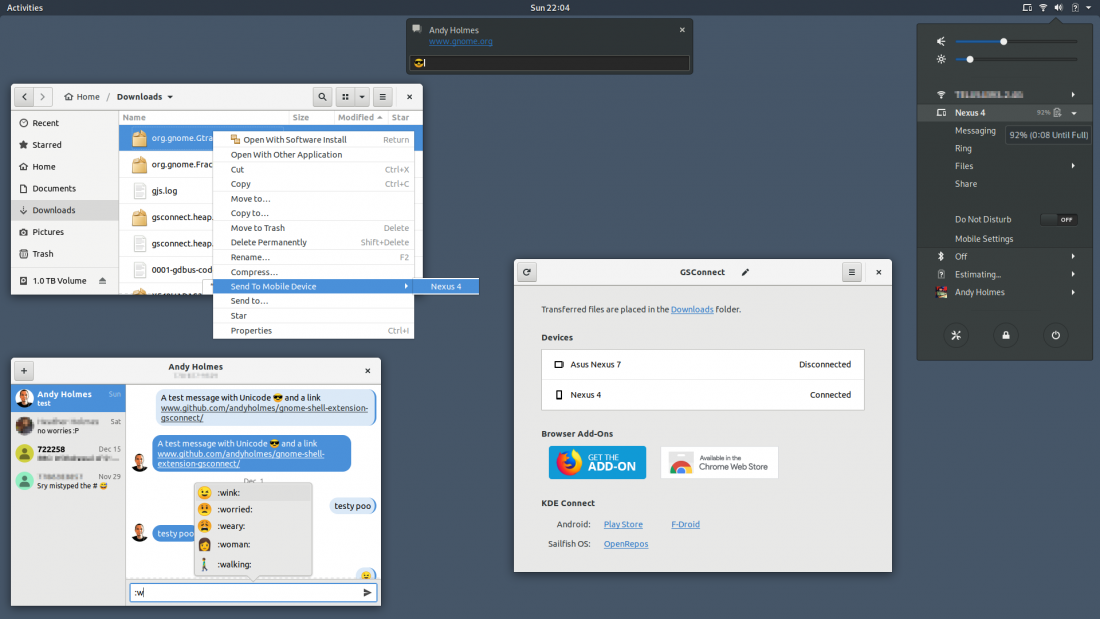
And there are two additional good news: everything runs locally on the Linux desktop computer (no cloud needed), and there is a porting for GNOME, called GSConnect. It uses GNOME Shell with Nautilus, Chrome and Firefox integration.
KDE Connect wiki has detailed instructions on how to install and configure the software. Below, I’ll report what I did to install and configure GSConnect on my Linux box with Ubuntu 20.04.
GSConnect installation
Despite being available as gnome-shell-extension-gsconnect package since Focal (20.04), it seems the recommended way to install GSConnect is via a GNOME Shell extension. So, I opened the relative GNOME Shell Extensions website on my Linux desktop computer, and agreed in installing the extension.
Alternatively, there is a manual installation procedure, consisting in download the latest release of the Extension from GitHub, and then installing it using the following command:
gnome-extensions install --force gsconnect@andyholmes.github.io.zip
A restart of GNOME Shell is required, and there are different ways of doing it, based on Wayland or X11/Xorg (how to know the server in use).
Android installation
In parallel, the app KDE Connect needs to be installed from Google Play or F-Droid.
Then, the setup can continue following the standard instructions, both on Android phone, and on the desktop computer. In a couple of minutes, the mobile device should be paired with the desktop.
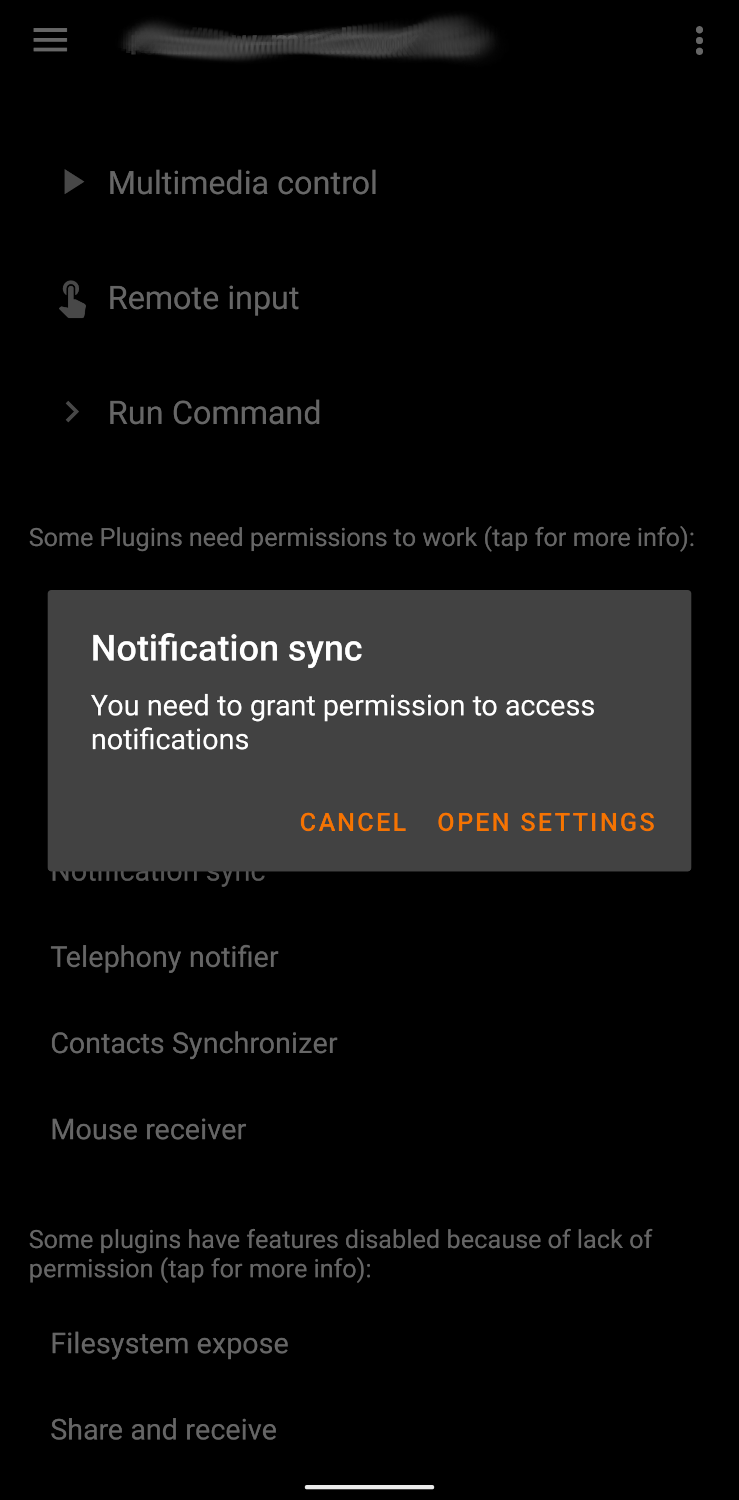
Several app features will work only after granting the respective Android App Permissions to KDE Connect. The app shows a list of those that are disabled, and tapping on one of them opens the corresponding system setting, where the permission can be given.
For example, to share notifications with the desktop computer, open the app, tap on the “Notification sync”, and then tap again to open the corresponding system setting for granting the permission.

Tap on the feature to enable… 
… and tap again to open the corresponding system setting for granting the permissing

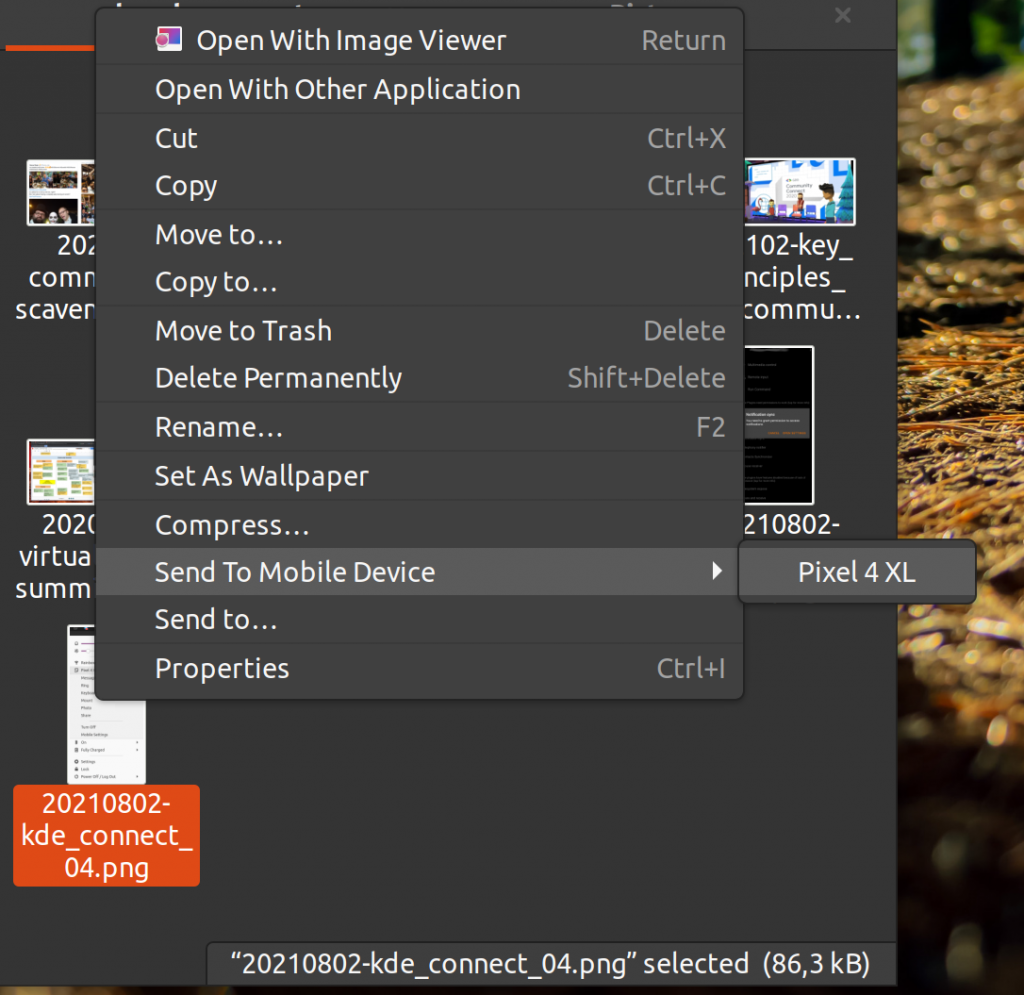
To enable integration with Nautilus, in order to send files from the desktop computer to the mobile device, the python-nautilus package has to be installed:
sudo apt install python-nautilus
In case of problems, the Help section of the wiki contains troubleshooting instructions to follow.
Conclusions
GSConnect desktop app, and the KDE Connect mobile app, offer a long list of feature that will require some time to be explored and mastered. But they almost allow to forget to have a mobile phone while using a desktop computer.
As a final note, there are early releases of KDE Connect for Windows and MacOS.

